Directions Not Included

DIY and craft adventures of two humans, three dogs and two cats.

  • home
  • about us
  • house tour
    • before & during
    • the afters
  • project gallery
    • renovations
    • furniture & decor
    • holidays
    • events
    • crafts
    • archives
  • featured
  • contact
    • advertise
    • disclosure
    • privacy

this is halloween – tile coasters

September 2, 2011 17 Comments

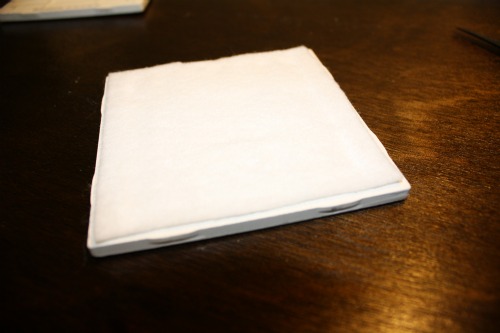
When I was making my first set of paper decorated tile coasters, I knew I was going to make sets for the holidays. They are a quick way to add a little holiday decor to your home.  White square tiles are only 16 cents a piece at my local Home Depot. Couple that with some decorative paper, felt for the bottoms and Mod Podge and you have another cheap craft to try.
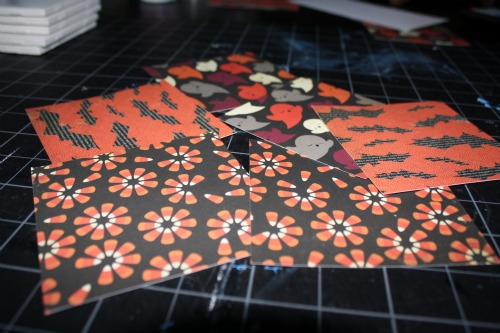
I picked out a few different papers from my Halloween stash to use for a set of six coasters.
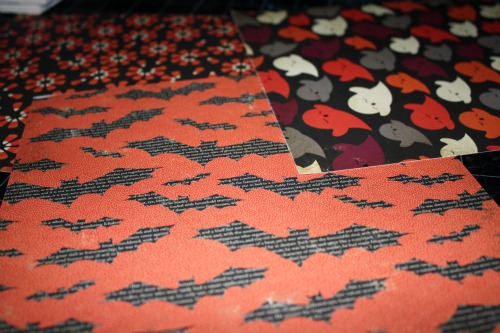
I cut them down to size using a ruler and a craft knife. I sized the paper so there would be a small edge of white tile exposed. If you want the paper to cover the entire tile, make sure to measure your tiles. They are always slightly different than the advertised size at the store. 
Use a decent layer of Mod Podge to adhere the paper to the tile and let them dry. You want to use the edge of the ruler or your fingers to smooth out any air bubbles you may get. 
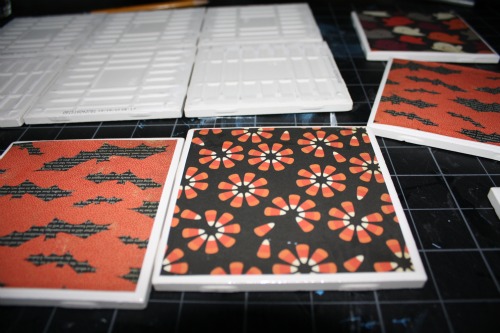
Once the paper is securely adhered to the tile, apply two to four layers of Mod Podge on top of the paper and tile to set the top of the coasters. You need to let each layer dry completely between each layer. 
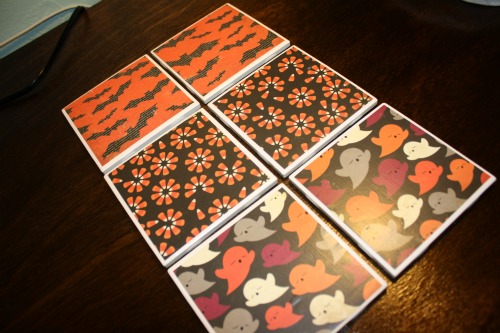
Use some felt cut down to size for the bottom of the coasters. You can use craft glue or a glue gun to attach it. If you don’t have felt in sheets you can also use the little felt circles with adhesive they sell in the stores for furniture and accessories.
When it is all said and done, you have a cute set of decorated coasters all ready for Halloween. If you need more detailed instructions for this please feel free to check out my original tutorial here: paper decorated tile coasters.
Hope you enjoyed the first in my series of Halloween related crafts. Stick around for a new one every Friday until October 31st.

Linking to my favorite link events: Link Events
Thanks for following Directions Not Included!

you might also like:

the perfect bridal shower favor - diy mason jar soy candles
i'm just getting soft - simple valentine's day idea
crafty for a cause - crafty envelopes and a call for donations

Filed Under: crafts, holidays, tutorial Tagged With: craft tutorial, crafty gifts, halloween

About Anna@DirectionsNotIncluded

Hi there! I'm Anna, the voice behind Directions Not Included. I'm a marketer, crafter, DIYer and lover of all things home related. You can usually find me covered in paint, cuddled with one of my pets or in front of a computer or other digital device. Thanks for reading Directions Not Included. I hope you stick around.

Comments

  1. Karen says

    September 2, 2011 at 5:14 pm

    I have this project pinned on my Pinterest board. Thanks so much for giving more detailed instructions and tips.

    Yours turned out so cute. I’m going to make these this weekend!

    Reply
  2. Emily @ EAKaHouse says

    September 2, 2011 at 11:43 pm

    I’ve got this project pinned too! I think I may just do fall ones since I have the paper for it already but I love your ghosts, adorable!

    Reply
  3. Karen says

    September 5, 2011 at 3:49 am

    Very cute! loved the papers you chose. Great job:) I am a new follower!!
    http://www.karismaheartsavannah.blogspot.com

    Reply
  4. Kayla and Andrew says

    September 5, 2011 at 1:57 am

    I just pinned this as well! I’m DEFINITELY making some this season.

    Reply
  5. La-Dee-da crafter says

    September 5, 2011 at 4:10 pm

    Love it!!!
    I am a new follower and look forward to more Halloween crafts!!! Yay!!!
    ladeedacreations.com

    Reply
  6. Design DNA says

    September 6, 2011 at 12:08 am

    Cute coasters! I’m hosting a Halloween link party now through the end of November. Stop by anytime!

    http://stirizsisters.blogspot.com/2011/09/halloween-imagination-station.html

    Corie @ Design DNA

    Reply
  7. Ila says

    September 6, 2011 at 12:27 am

    These are adorable and such a great idea to use up some of my scrapbook paper! Love it! I am a new follower
    http://lilsprinklesofjoy.blogspot.com

    Reply
  8. Lowri says

    September 7, 2011 at 9:21 pm

    I made some of these recently too. These look fab – I never thought of doing holiday themes – but now I will!
    Lowri
    http://papervinenz.blogspot.com/

    Reply
  9. Mimi says

    September 8, 2011 at 4:40 pm

    Love your Halloween coasters! I made some a while back using maps and now I want some for the holiday! Thanks so much for sharing!

    Reply
  10. Ashley says

    September 9, 2011 at 2:30 am

    thanks for sharing this!!! i love them and think i will make some!! PINNED:)

    Reply
  11. Catch A Falling Star says

    September 9, 2011 at 10:50 pm

    I really love the papers you used!
    I made some a couple of years ago with some old Coca Cola ads.
    I should totally make some Halloween ones.
    Thanks for sharing!

    Reply
  12. Melissa says

    September 10, 2011 at 11:41 pm

    LOVE this idea! I’d love to feature this craft on my site, if that’s okay. It’s so cute, and I love that they can be made on a budget and to match our decor or event/holiday! Thanks for sharing it! Definitely have a new follower here 🙂

    Melissa
    http://mnarbaugh.blogspot.com

    Reply
  13. Lesley says

    September 15, 2011 at 3:38 am

    Hey sweetie!
    Thank you so much for the great idea! I featured it as my fave from last week’s party! ♥

    Reply
  14. Lindy@Itsy Bitsy Paper says

    September 25, 2011 at 3:17 pm

    These are great too! Thank you so much for sharing the link.
    http://www.itsybitsypaperblog.com

    Reply
  15. Celeste says

    September 25, 2011 at 8:29 pm

    These are great! Thanks for sharing!

    Reply
  16. Jennifer @ Delightfully Noted says

    September 25, 2011 at 9:06 pm

    Adorable! I’ve been wanting to make coasters. You’ve inspired me to get on w/ it already!

    Reply
  17. Stephanie says

    September 29, 2011 at 2:01 pm

    Those are really cute, I saw a post on Pinterest but I never thought to do Halloween ones. Such a great idea

    Reply

Leave a Reply Cancel reply

Your email address will not be published. Required fields are marked *

hi there, i’m anna

dnirssyellow dnipinterestyellow dnifacebookyellow dniinstagramyellow AnnaDNI2014 Welcome to Directions Not Included. I'm Anna, the voice behind the blog. I'm a marketer, crafter, DIYer, and lover of wine and sushi. Oh and I love my husband Ray, too. I also seem to be a magnet for scruffy mutts and cats. Want to know more about us and what we are doing? Learn more here.

what we’ve been up to

looking for something?

pinterest addict

Visit Anna [DirectionsNotIncluded]'s profile on Pinterest.

our lovely sponsors

RMPotteryButtonFINAL2AD-Button adad

about

Directions Not Included follows the DIY and craft adventures of two humans, three dogs and two cats as they take one old Florida home and make it theirs.

This blog will feature DIY tips, before and after photos, craft tutorials, home decor trends, and gratuitous pictures of our five rescued furry children.

Copyright 2010 - 2014. Directions Not Included - Anna Cruz-Morales.

The contents of this blog, including text, original photos and ideas are the sole property of the author. If you intend to use my text or images, please link back to my site and credit given to Directions Not Included. Please share only one image and direct readers to my site. A notification email would be greatly appreciated.

like us on facebook

like us on facebook

don’t miss any of the fun

dnirssyellow dnipinterestyellow dnifacebookyellow dniinstagramyellow dnitwitteryellow dnigoogleyellow

subscribe via email

Enter your email address to subscribe to this blog and receive notifications of new posts by email.

Copyright Directions Not Included 2014 * ·Daily Dish Pro Theme * Modified by Directions Not Included * Genesis Framework * by StudioPress * WordPress * Log in