Directions Not Included

DIY and craft adventures of two humans, three dogs and two cats.

  • home
  • about us
  • house tour
    • before & during
    • the afters
  • project gallery
    • renovations
    • furniture & decor
    • holidays
    • events
    • crafts
    • archives
  • featured
  • contact
    • advertise
    • disclosure
    • privacy

fabric wreath tutorial

January 3, 2012 20 Comments

Some of my favorite decor pieces from the baby shower I just hosted were the fabric wreaths I made. I love how simple and elegant they came out and I also love the fact that I should be able to repurpose these for other events and holidays coming up. I made one large one for the front door using a 10 inch foam wreath form and two smaller ones for my back door using the 6 inch wreath forms. If you like these, I hope this fabric wreath tutorial will be helpful if you try and make one yourself.


I’ve had a few requests for a tutorial on this so here it is. If you make one, please share the photos!

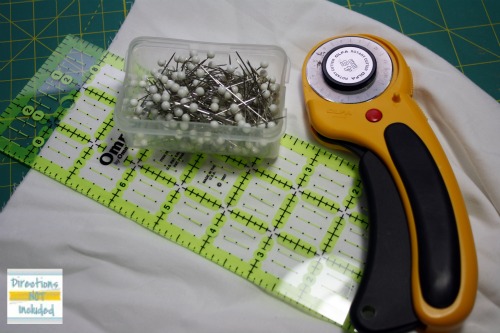
I used a bleached muslin I purchased on sale a while ago to make these. Besides the fabric and the wreath form, I used quilting pins, my rotary cutter and a plastic measuring guide for cutting my fabric.

I used the guide and the rotary cutter to cut 3 inch squares out. It doesn’t have to be perfect and I actually liked the fraying that happened from cutting the fabric haphazardly.

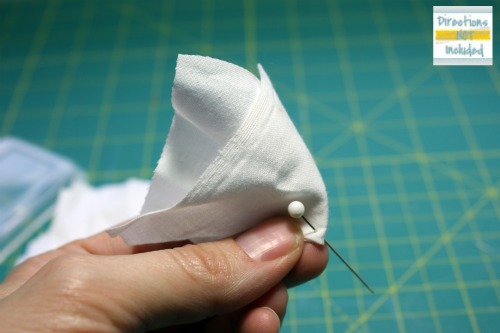
Once you cut out your mountain of squares, you want to pinch and fold them so the bottom becomes a point and the tops look something like this. Again, this doesn’t have to be perfect. You’ll like the visual variety it gives if not all of them are absolutely identical.

Once you have your square folded up, use a quilting pin to get ready to attach it to the foam wreath form.

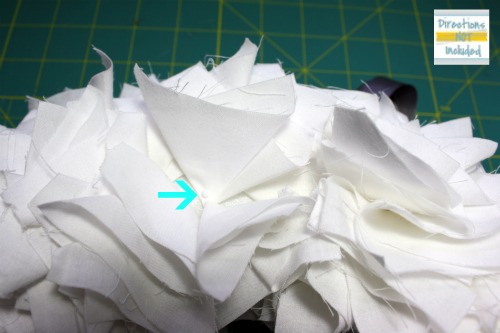
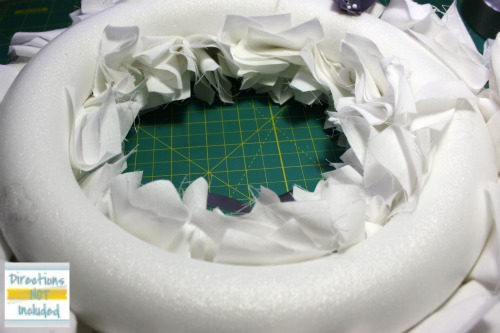
Here is a close up with the arrow pointing to the quilting pin on the wreath. Just start arranging them close together to fill up your form. I found it easier to fill in sections little by little until I reached the desired fullness.

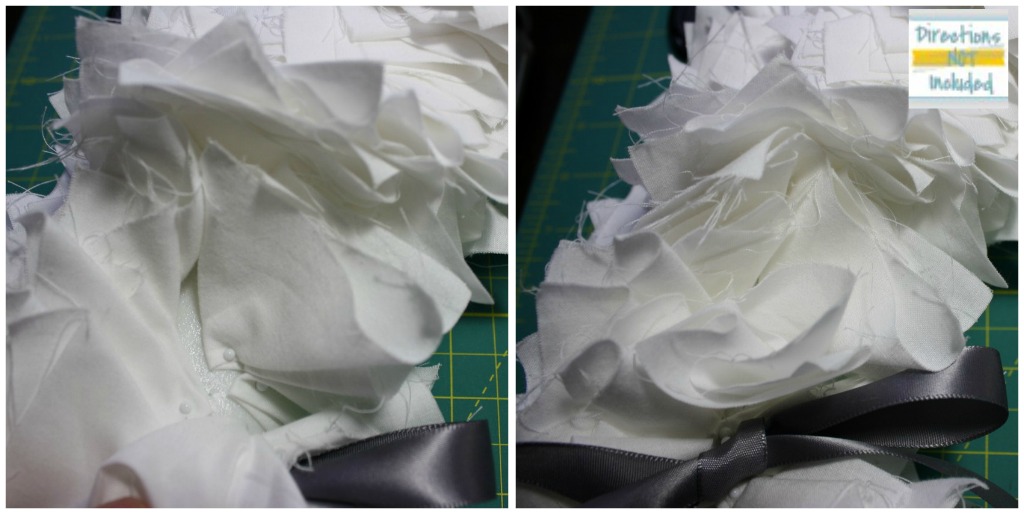
Don’t think you need to completely cover the foam either. You’ll notice in the picture on the right below, there is foam showing but when you fluff up the fabric on the left, no one will ever know.

And just in case you are wondering, I did not put any on the back since I wanted it to lay flat against the door. For the two that I made for my glass exterior doors, I just wrapped some white muslin along the back to finish off the backs a bit.

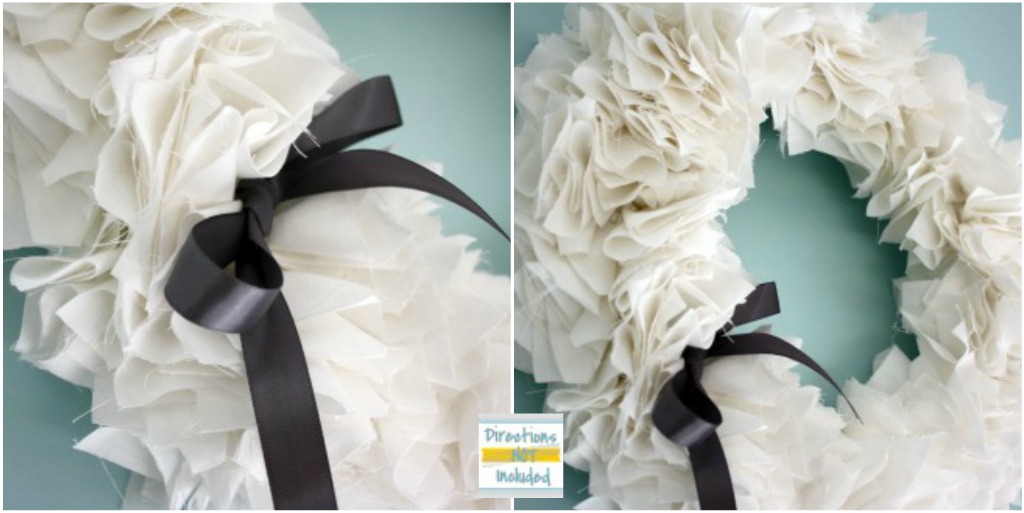
Here are two close ups of the larger finished one.

If you have any questions or need me to clarify anything in this fabric wreath tutorial, just leave me a comment and I’ll be glad to help. Enjoy!

Linking up to my favorite parties here: Link Events
Newlyweds on a Budget – Tutorial Tuesday

~Anna

Thanks for following Directions Not Included!

you might also like:

but all I've got is a photograph - diy instagram photo display
this is halloween - diy halloween tree
bachelorette weekend favors - diy hangover kit

Filed Under: crafts, party decor, tutorial Tagged With: baby shower, bridal shower, craft tutorial, crafty gifts, fabric, party decor

About Anna@DirectionsNotIncluded

Hi there! I'm Anna, the voice behind Directions Not Included. I'm a marketer, crafter, DIYer and lover of all things home related. You can usually find me covered in paint, cuddled with one of my pets or in front of a computer or other digital device. Thanks for reading Directions Not Included. I hope you stick around.

Comments

  1. Michelle P says

    January 3, 2012 at 1:32 pm

    Pretty!

    Reply
  2. Cassie @ Primitive & Proper says

    January 3, 2012 at 1:53 pm

    i love how full it looks and the simple touch of the bow- it’s perfect!

    Reply
  3. Patty says

    January 3, 2012 at 2:04 pm

    This is so cute! I think I like your idea of the fabric better than what I’m working on. I’ve got felt circles that I’m cutting out and it’s taking FOREVER. I may have to scrap it and do this instead!

    Reply
  4. Carmella says

    January 3, 2012 at 12:36 pm

    beatutiful work! I love the way they look hanging on the doors! thanks for sharing, I never realized it could be that easy!

    Reply
  5. Carol@TheDesignPages says

    January 3, 2012 at 6:40 pm

    I’m so glad you did a tutorial for this. It’s beautiful but I would never in a million years have figured out that it’s pinned onto a form. Lovely!!

    Reply
  6. Jen-CraftOManiac says

    January 4, 2012 at 1:11 am

    LOOKS GREAT! WELL DONE. winks, jen

    Reply
  7. Michelle says

    January 5, 2012 at 9:51 am

    OOOh I saw these the other day and fell in love I am sooooo glad you decided to put up the tutorial! Thanks so much, will have to try these for sure!

    Reply
  8. Barb says

    January 5, 2012 at 7:11 pm

    This wreath is beautiful!

    Reply
  9. Dianna says

    January 6, 2012 at 1:49 am

    pretty! I’m your newest follower 🙂

    Dianna
    craft-a-spell.blogspot.com

    Reply
  10. Ashley says

    January 10, 2012 at 2:34 am

    How pretty!! It looks amazing. Keep up the good work. =)
    http://thelatestfind.blogspot.com/

    Reply
  11. Ginger says

    January 10, 2012 at 6:19 am

    I’ll be featuring YOU this Thursday in my {take a look at you} post. Thank you so much for linking up to {wow me} wednesday last week. Hope to see you again tomorrow night at 7 pm when this week’s party goes live. 🙂

    Ginger @ gingersnapcrafts.com

    Reply
  12. Q @ JAQS says

    January 11, 2012 at 12:25 am

    I featured you today at JAQS Studio 🙂

    http://www.jaqsstudio.com/2012/01/made-by-me-13-linky-party-and-features.html

    Reply
  13. Jill says

    January 12, 2012 at 2:02 pm

    I love this wreath! May have to add it to my to-do list! 🙂 Now following from Sweet Diva!

    ~Jill
    http://www.sweetdivamj.com

    Reply
  14. Chrissy.Barile says

    January 12, 2012 at 2:49 pm

    Love this!!! Thank you for sharing!

    Reply
  15. The Mayne's says

    January 17, 2012 at 4:32 am

    I love this. How much fabric did you end up using, and about how many squares do you need for a 10″ wreath?

    Reply
  16. Danielle says

    January 22, 2012 at 12:21 am

    LOVE this!!

    Reply
  17. Debbie {Visual Eye Candy} says

    February 14, 2012 at 3:53 pm

    Very Pretty! I need to make one now. Great tutorial.
    visualeyecandy.blogspot.com

    Reply
  18. Michelle@Somedaycrafts says

    July 13, 2012 at 1:41 am

    Thanks for linking us up on the Someday Crafts Facebook page. We will be featuring your project tomorrow on our blog! Stop back in and grab a featured on Someday Craft button for your blog!

    Reply
  19. c.w.frosting says

    July 15, 2012 at 2:56 am

    So fluffy & delightful! Great directions as well 😉 xo caroline @ c.w.frosting

    Reply
  20. angela frampton says

    July 31, 2012 at 12:25 am

    How much fabric is required?
    And do you know how many squares you cut for the 10″ and 6″?
    Loooove it!

    Reply

Leave a Reply Cancel reply

Your email address will not be published. Required fields are marked *

hi there, i’m anna

dnirssyellow dnipinterestyellow dnifacebookyellow dniinstagramyellow AnnaDNI2014 Welcome to Directions Not Included. I'm Anna, the voice behind the blog. I'm a marketer, crafter, DIYer, and lover of wine and sushi. Oh and I love my husband Ray, too. I also seem to be a magnet for scruffy mutts and cats. Want to know more about us and what we are doing? Learn more here.

what we’ve been up to

looking for something?

pinterest addict

Visit Anna [DirectionsNotIncluded]'s profile on Pinterest.

our lovely sponsors

RMPotteryButtonFINAL2AD-Button adad

about

Directions Not Included follows the DIY and craft adventures of two humans, three dogs and two cats as they take one old Florida home and make it theirs.

This blog will feature DIY tips, before and after photos, craft tutorials, home decor trends, and gratuitous pictures of our five rescued furry children.

Copyright 2010 - 2014. Directions Not Included - Anna Cruz-Morales.

The contents of this blog, including text, original photos and ideas are the sole property of the author. If you intend to use my text or images, please link back to my site and credit given to Directions Not Included. Please share only one image and direct readers to my site. A notification email would be greatly appreciated.

like us on facebook

like us on facebook

don’t miss any of the fun

dnirssyellow dnipinterestyellow dnifacebookyellow dniinstagramyellow dnitwitteryellow dnigoogleyellow

subscribe via email

Enter your email address to subscribe to this blog and receive notifications of new posts by email.

Copyright Directions Not Included 2014 * ·Daily Dish Pro Theme * Modified by Directions Not Included * Genesis Framework * by StudioPress * WordPress * Log in