Directions Not Included

DIY and craft adventures of two humans, three dogs and two cats.

  • home
  • about us
  • house tour
    • before & during
    • the afters
    • to do list
  • project gallery
    • archives
    • crafts
    • events
    • furniture & decor
    • holidays
    • renovations
  • featured
  • contact
    • advertise
    • disclosure
    • privacy

this is halloween – diy halloween tree

September 25, 2014 7 Comments

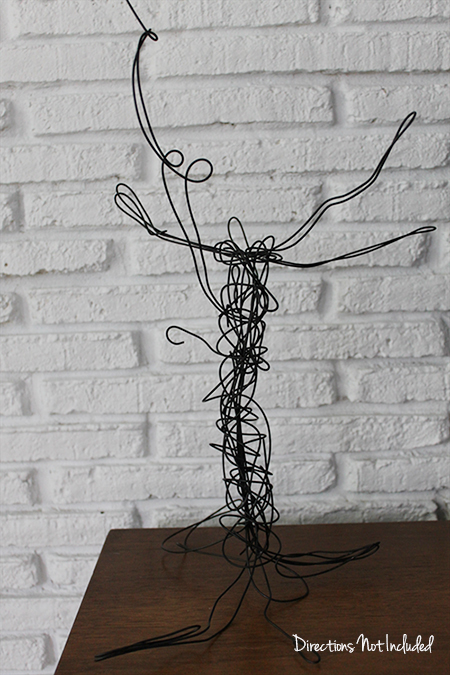
Quite some time ago I pinned this awesome Halloween tree. I kept going back to it on my Halloween board for inspiration, and then finally realized it was Gretchen’s from Boxy Colonial’s. She scored this amazing tree at a thrift store for next to nothing and decked it out with a handmade banner and lights. Color me jealous, because thrift stores in South Florida are horrendous so there was no way I was going to find a Halloween tree like that (or much of anything for that matter). But I wanted one. I really, really wanted one. My internet search was pretty futile so I decided to try and make one. This is a complete experiment to try and make a DIY Halloween tree. I didn’t have high expectations, but I’ve been pleasantly surprised. I started off with some wire I bought at Home Depot for some other Halloween decorations from last year. I made the very crude shape of a spooky tree. Very crude.

DIY Halloween Tree - Directions Not Included

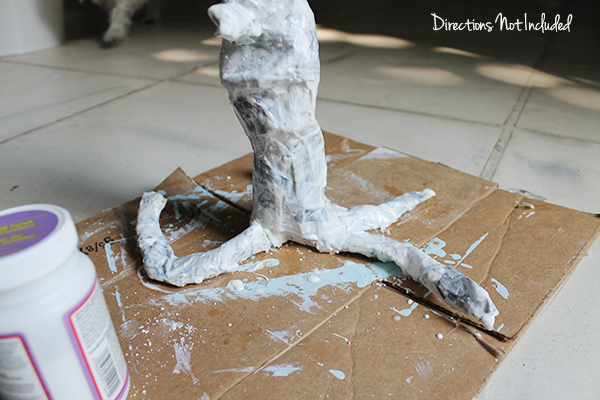
Building this form up with paper mache was my initial thought, even though I hadn’t worked with it since I was probably 8 and made a ladybug stool during camp. The thing with paper mache is that it uses flour. I have Celiac disease which means no wheat flour for me at all – I can’t ingest it and I don’t want to touch it either. I found a gluten free paper mache recipe and decided to try that. I am the messiest crafter ever. This was such a disaster mess-wise. Ray had to take pictures of what I was doing and I wasn’t allowed to touch anything in the house. During this, I knew he wanted to throw me outside and hose me off. Being that it was a million degrees outside, I had to make it inside. The mosquitoes and heat are just insane this time of year.

DIY Halloween Tree - Directions Not Included

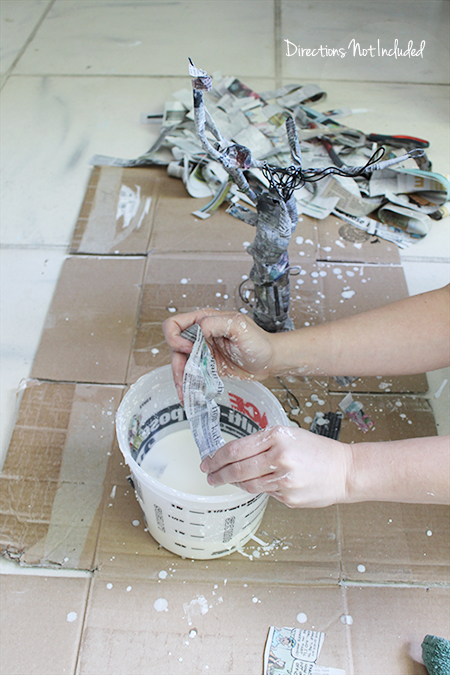
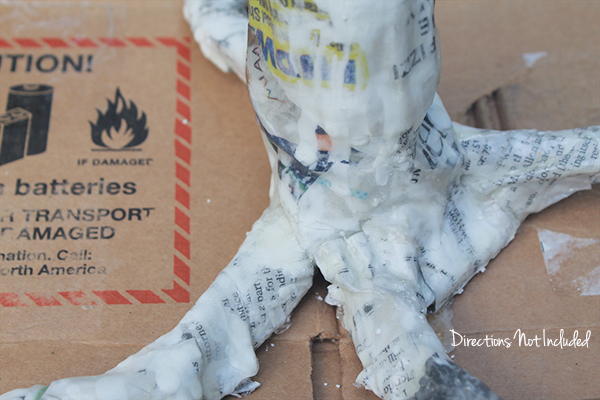
Messy as it was, it worked. I kept adding layers of newspaper to create the form of the Halloween tree. The more I added, the better it looked.

DIY Halloween Tree - Directions Not Included

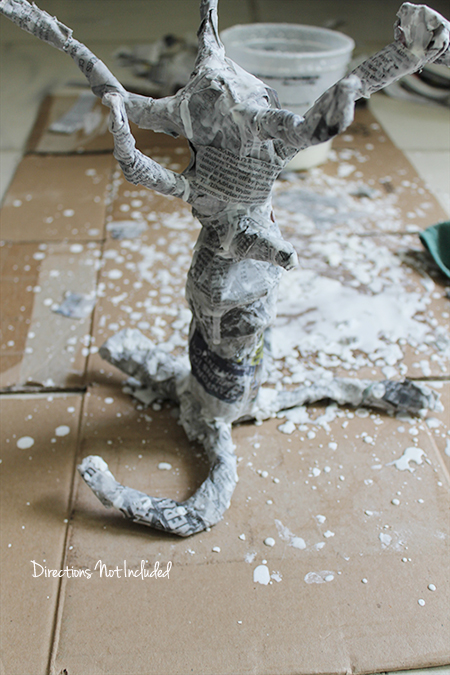
Now here is the thing. I didn’t add glue or another additive to the GF paper mache mixture so it was a little softer than I thought. I decided to use some Mod Podge to help seal and harden the tree. I used the Hard Finish kind and just glopped it on. Yes, “glopped” is a word now.

DIY Halloween Tree  - Directions Not Included

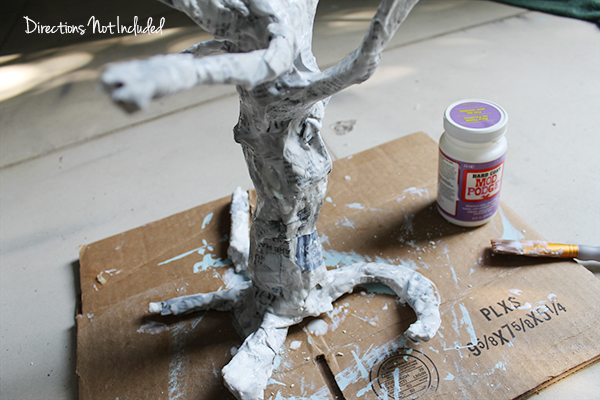
Normally, I follow all instructions and use a paint brush or sponge to very lightly add layers of Mod Podge to any piece I work on. That said, for this Halloween tree, adding heavy layers added more character and fullness to the tree.

DIY Halloween Tree - Directions  Not Included

DIY Halloween Tree - Directions Not Included

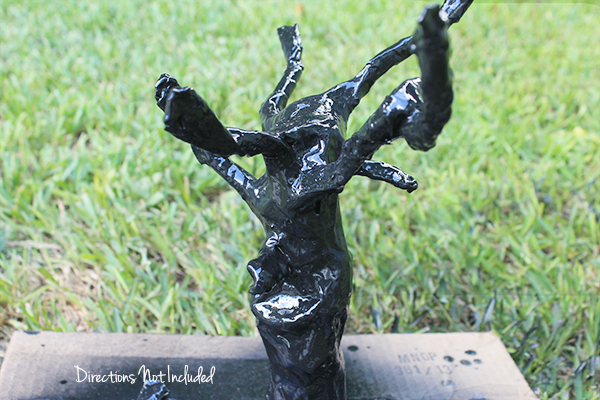
After a handful of Mod Podge layers, I spray painted the whole thing black.

DIY Halloween Tree - Directions Not Included

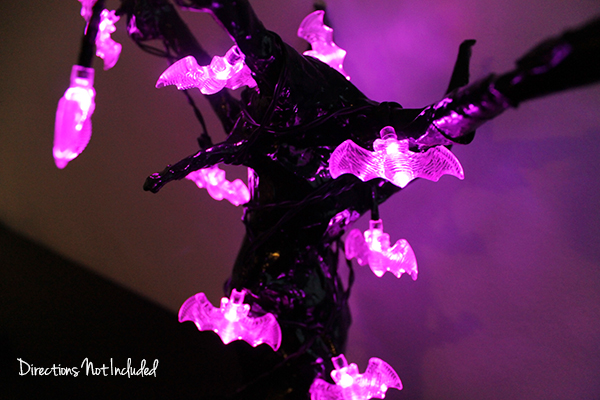
Wrap some mini-Halloween bat-shaped lights, and you have your very own DIY Halloween Tree. It actually looks good in the sunlight too. I’m just too lazy to take another photo.

DIY Halloween Tree - Directions Not Included DIY Halloween Tree - Directions Not Included DIY Halloween Tree - Directions Not Included

Thank you, Gretchen for the inspiration. I’m excited to add this to my Halloween decor this year. Now if I can only decide where to display it.

Anna

Follow Anna [DirectionsNotIncluded]’s board this is halloween on Pinterest.


you might also like:

student for the day - playing with power tools
cheesy heart paper chain - a valentine's day craft
i lost my mind - disney wine & dine half marathon

Filed Under: crafts, holidays, tutorial, uncategorized Tagged With: craft tutorial, crafts, halloween, holidays

About Anna@DirectionsNotIncluded

Hi there! I'm Anna, the voice behind Directions Not Included. I'm a marketer, crafter, DIYer and lover of all things home related. You can usually find me covered in paint, cuddled with one of my pets or in front of a computer or other digital device. Thanks for reading Directions Not Included. I hope you stick around.

Comments

  1. cassie says

    September 25, 2014 at 8:22 am

    oh how cool! i love that, anna!

    Reply
  2. Gretchen@BoxyColonial says

    September 25, 2014 at 8:23 am

    ooh, that turned out great! When the thrift store won’t come through for you, you have to take matters into your own hands! Someone told me in a comment that mine is originally from Pottery Barn. I still need to pull it out this year…

    Reply
    • Anna@DirectionsNotIncluded says

      October 1, 2014 at 6:27 pm

      I’m glad it came out decent. Still love yours but I didn’t think you would appreciate me driving up there and taking it 😉

      Reply
  3. Ashley@AttemptsAtDomestication says

    September 25, 2014 at 9:14 pm

    That looks so cool! What a great idea!

    Reply
  4. Chloe Crabtree says

    September 26, 2014 at 6:26 am

    You did such a great job, and your Halloween tree is so cute! I think the outside picture of it looks like it even has a scary face on it. I think I might try this and try to make it have a face in the trunk, with mean-looking eyebrows!

    Reply
    • Anna@DirectionsNotIncluded says

      October 1, 2014 at 6:28 pm

      You should make one! I had grand ideas of something more detailed, but I never got around to it. There were some cool tutorials out there for very detailed spooky trees.

      Reply
  5. Julia@Cuckoo4Design says

    September 29, 2014 at 9:13 am

    Awesome job, love it!

    Reply

Leave a Reply Cancel reply

Your email address will not be published. Required fields are marked *

hi there, i’m anna

dnirssyellow dnipinterestyellow dnifacebookyellow dniinstagramyellow dnitwitteryellow dnigoogleyellow AnnaDNI2014 Welcome to Directions Not Included. I'm Anna, the voice behind the blog. I'm a marketer, crafter, DIYer, and lover of wine and sushi. Oh and I love my husband Ray, too. I also seem to be a magnet for scruffy mutts and cats. Want to know more about us and what we are doing? Learn more here.

our lovely sponsors

RMPotteryButtonFINAL2AD-Button adad

what we’ve been up to

looking for something?

pinterest addict

Visit Anna [DirectionsNotIncluded]'s profile on Pinterest.

proud to be part of

TBS 150

about

Directions Not Included follows the DIY and craft adventures of two humans, three dogs and two cats as they take one old Florida home and make it theirs.

This blog will feature DIY tips, before and after photos, craft tutorials, home decor trends, and gratuitous pictures of our five rescued furry children.

Copyright 2010 - 2014. Directions Not Included - Anna Cruz-Morales.

The contents of this blog, including text, original photos and ideas are the sole property of the author. If you intend to use my text or images, please link back to my site and credit given to Directions Not Included. Please share only one image and direct readers to my site. A notification email would be greatly appreciated.

don’t miss any of the fun

dnirssyellow dnipinterestyellow dnifacebookyellow dniinstagramyellow dnitwitteryellow dnigoogleyellow

Copyright Directions Not Included 2014 * ·Daily Dish Pro Theme * Modified by Directions Not Included * Genesis Framework * by StudioPress * WordPress * Log in