Directions Not Included

DIY and craft adventures of two humans, three dogs and two cats.

  • home
  • about us
  • house tour
    • before & during
    • the afters
  • project gallery
    • renovations
    • furniture & decor
    • holidays
    • events
    • crafts
    • archives
  • featured
  • contact
    • advertise
    • disclosure
    • privacy

ikea hack bar – a diy bar from ikea cabinets – the final reveal

December 5, 2011 10 Comments

We have progress folks! I gave a glimpse of what was going on in our bar last week. We used IKEA kitchen cabinets, the hanging wall kind, to create a custom floating bar. Our very own IKEA hack bar.

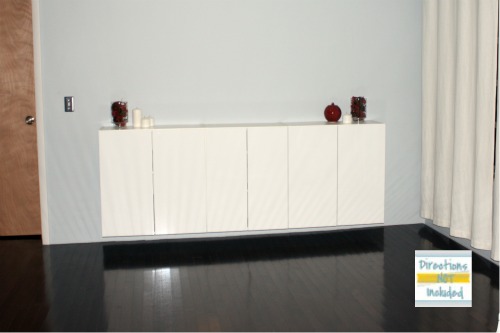
This is where we made it to last weekend. Cabinets built and hanging and that is about it.

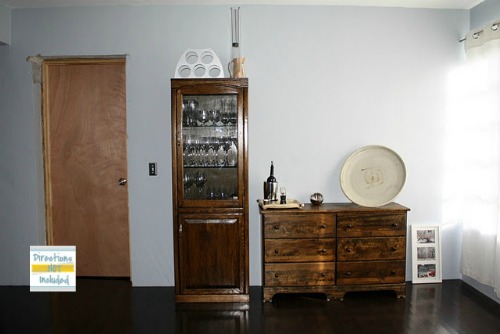
It was a marked improvement over this but still needed some finishing touches.

We went to the nice lumber yard in town and picked up some mahogany plywood. They have a great selection of wood in plywood form, which is always a great thing for projects like this. It ends up being much cheaper than other alternatives and the finish is great. Best part of this lumber yard is that they will cut the wood for you for a small fee. So we came home with the full plywood sheet cut down to size for this project and another one I have up my sleeve.

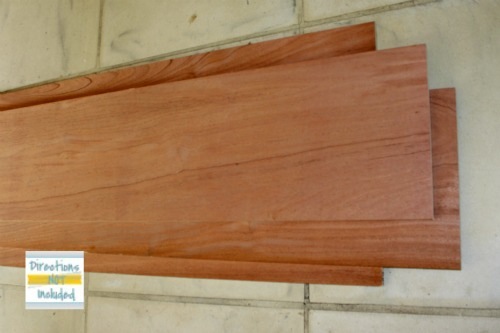
We wanted a thicker top than the standard size of this plywood. Thicker pieces are more expensive so to save some cash, we glued down two pieces together. And weighed it down with all sorts of other stuff to make sure the seal with tight and we managed to keep it from warping.

You’ll notice our kitchen backsplash tiles are being put to good use. Haven’t managed to get that project off the ground yet. We also put small screws in from the bottom of the piece for added support. I just forgot to take a picture of that.

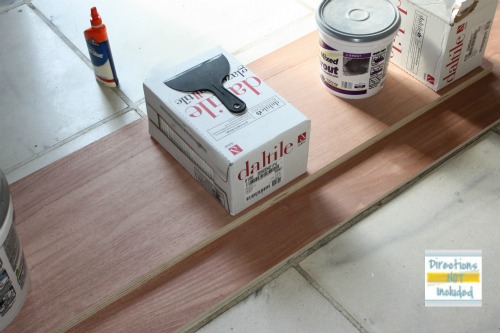
After a good sanding, we stained the top with a dark stain that matches our floors throughout the house. We used tung oil to seal the surface instead of a poly. We have used this on other custom furniture pieces in our house and love the finish.

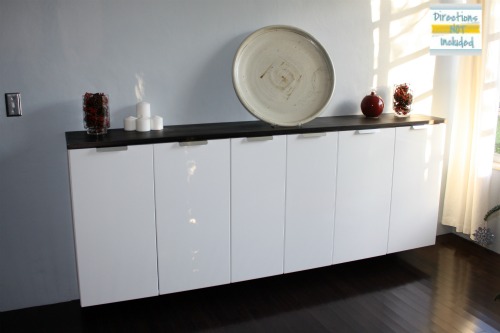
Add a little hardware as a finishing touch and there you have it. Our very own IKEA hack bar – a custom dry bar made from IKEA kitchen cabinets.

I really love how it cleans up the space. It will also be great to use as a buffet when we host dinner parties too.

What do you think? Anyone finish up a major project this weekend?

Linking up to these parties: Link Events
~Anna

PS – Don’t forget to enter the Pick Your Plum Giveaway! It ends tonight.

Thanks for following Directions Not Included!

you might also like:

but all I've got is a photograph - diy instagram photo display
a very delayed reveal - our diy ikea kitchen
changes - directions not included before and afters

Filed Under: furniture, home decor Tagged With: bar, dining room, IKEA

About Anna@DirectionsNotIncluded

Hi there! I'm Anna, the voice behind Directions Not Included. I'm a marketer, crafter, DIYer and lover of all things home related. You can usually find me covered in paint, cuddled with one of my pets or in front of a computer or other digital device. Thanks for reading Directions Not Included. I hope you stick around.

Comments

  1. jeanette from everton terrace says

    December 5, 2011 at 1:42 pm

    Nicely done indeed! I have some Ikea shelves mounted a the wall like this in my husband’s office and they absolutely need something to finish off the top. Thanks for the inspiration!!

    Reply
  2. Cassie @ Primitive & Proper says

    December 5, 2011 at 2:13 pm

    ooh it looks fabulous! i love the hardware and the top- dramatic and modern!

    Reply
  3. Trissta says

    December 5, 2011 at 5:31 pm

    LOVE! I wish I had something like that in my house!!! You’ve done a great job with it! I definitely love the wood on the top and the pulls…. They just work together so well!!

    Much Love,
    Trissta

    Reply
  4. Kelly says

    December 5, 2011 at 3:10 pm

    Gorgeous and brilliant! I love the top you made. Well done!

    Reply
  5. DecorandtheDog says

    December 6, 2011 at 2:26 am

    Wow! This looks amazing!!

    Reply
  6. Emily @ EAKaHouse says

    December 6, 2011 at 5:46 am

    Love it! It turned out perfect for that space. The dark top is great too.

    Reply
  7. Jenny@daysofchalkandchocolate says

    December 6, 2011 at 10:04 pm

    just gorgeous!!

    Reply
  8. Marilyn says

    December 7, 2011 at 2:49 pm

    Very nicely done Anna.. I love this.. : ))

    Reply
  9. thismyhouse says

    January 4, 2012 at 6:51 pm

    Fantastic — your new bar looks amazing! And I would have never guessed that you doubled-up on the countertop wood; it’s seamless. 🙂

    Beautiful job!

    Reply

Trackbacks

  1. Scott Olson painting and an IKEA hack bar update says:
    February 26, 2014 at 7:07 pm

    […] we refinished the bar area, we knew we wanted artwork or something to anchor the space. I used our IKEA hack bar all the time for parties or as my mantle for holidays. Using the bar as a buffet was perfect use […]

    Reply

Leave a Reply Cancel reply

Your email address will not be published. Required fields are marked *

hi there, i’m anna

dnirssyellow dnipinterestyellow dnifacebookyellow dniinstagramyellow AnnaDNI2014 Welcome to Directions Not Included. I'm Anna, the voice behind the blog. I'm a marketer, crafter, DIYer, and lover of wine and sushi. Oh and I love my husband Ray, too. I also seem to be a magnet for scruffy mutts and cats. Want to know more about us and what we are doing? Learn more here.

what we’ve been up to

looking for something?

pinterest addict

Visit Anna [DirectionsNotIncluded]'s profile on Pinterest.

our lovely sponsors

RMPotteryButtonFINAL2AD-Button adad

about

Directions Not Included follows the DIY and craft adventures of two humans, three dogs and two cats as they take one old Florida home and make it theirs.

This blog will feature DIY tips, before and after photos, craft tutorials, home decor trends, and gratuitous pictures of our five rescued furry children.

Copyright 2010 - 2014. Directions Not Included - Anna Cruz-Morales.

The contents of this blog, including text, original photos and ideas are the sole property of the author. If you intend to use my text or images, please link back to my site and credit given to Directions Not Included. Please share only one image and direct readers to my site. A notification email would be greatly appreciated.

like us on facebook

like us on facebook

don’t miss any of the fun

dnirssyellow dnipinterestyellow dnifacebookyellow dniinstagramyellow dnitwitteryellow dnigoogleyellow

subscribe via email

Enter your email address to subscribe to this blog and receive notifications of new posts by email.

Copyright Directions Not Included 2014 * ·Daily Dish Pro Theme * Modified by Directions Not Included * Genesis Framework * by StudioPress * WordPress * Log in