Directions Not Included

DIY and craft adventures of two humans, three dogs and two cats.

  • home
  • about us
  • house tour
    • before & during
    • the afters
  • project gallery
    • renovations
    • furniture & decor
    • holidays
    • events
    • crafts
    • archives
  • featured
  • contact
    • advertise
    • disclosure
    • privacy

paper wine charms

July 8, 2011 7 Comments

Wandering around Michael’s I found packages of these earring hoops and realized they look just like the ones used for charms I once had for my wine glasses. You know, the ones that everyone gave as housewarming gifts years ago with little beads on them. I was never a fan of the look but I used them because admittedly, wine glasses are hard to keep track of when you’ve been drinking 😉 Problem solved – I could make ones that would be more our style. 

Paper would be the easiest option since I have TONS. I laid out my supplies of some patterned paper, punch, Mod Podge and the charms. I punched out two pieces of each patterned paper so there would be two “good sides” for each charm. I picked a varied selection of paper and colors so each one would be different and easily identifiable. 


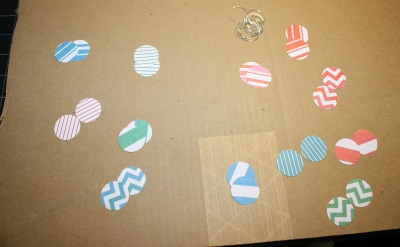
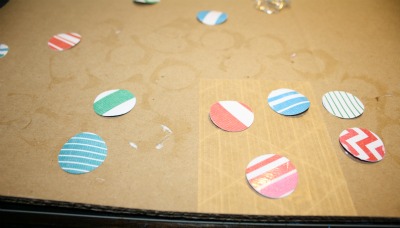
I glued together the matching sides with just a regular craft glue pen that I had on hand trying to make them as even as possible. I used a light coating of the Mod Podge to harden and seal the paper. Be careful not to Mod Podge your paper to your table! Let it dry completely on one side before doing the other side. You can use tweezers or a toothpick to hold the paper down so you don’t end up with Mod Podge all over your fingers like I did. I used the Hard Coat Mod Podge because I had it on my desk but there are various types available and they are great for a variety of uses.


Once they completed dried I punched a small hole in each using a craft punch. You might actually want to punch the holes before using the Mod Podge but I was impatient and didn’t think of that before. I was going to leave them like that but I remembered my stash of paper grommets. I bought a bunch for when I make cards but I rarely use the plain steel colored ones anymore. The grommets were the perfect embellishment for these and also serve to reinforce the hole.


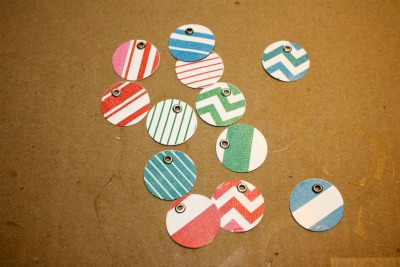
And there you have it, simple to make, paper wine charms. 

I have a ridiculous amount of patterned paper since I make cards so I’m going to make some for Halloween and Christmas since we always have company over during those times. These would also be perfect to customize for baby showers or bridal showers with colors that match the theme of the party.  

Happy Friday!


Linking to my favorite link events: Link Events


Thanks for following Directions Not Included!

you might also like:

potty mouth - inappropriate office gifts
after all this time? always - harry potter onesies
student for the day - playing with power tools

Filed Under: crafts, party decor, tutorial Tagged With: craft tutorial, paper

About Anna@DirectionsNotIncluded

Hi there! I'm Anna, the voice behind Directions Not Included. I'm a marketer, crafter, DIYer and lover of all things home related. You can usually find me covered in paint, cuddled with one of my pets or in front of a computer or other digital device. Thanks for reading Directions Not Included. I hope you stick around.

Comments

  1. jandjhome says

    July 8, 2011 at 2:14 pm

    I want some of these. What a great idea. I made some beaded ones a few years ago, but ugh, not really me. I may go borrow that hole puncher 🙂

    Reply
  2. Esther is not-quite-perfect says

    July 12, 2011 at 4:18 pm

    These are great! I wanted to buy some that Harley-Davidson makes, but at 4 for 31€ they are a way too steep. I have the earrings, but was fiddling with the idea of the decoration, and I just might make them out of paper…with a twist! Thanks for the inspiration!

    Reply
  3. kasia says

    July 13, 2011 at 7:05 pm

    They look really great! Thanks for sharing

    Reply
  4. Erica says

    July 18, 2011 at 1:31 am

    Such a great and simple idea!

    Reply
  5. Elizabeth says

    July 29, 2011 at 3:27 pm

    These are so fun! Thanks so much for linking up to Made With Love! I’m featuring you on my FB page today! http://www.facebook.com/SewChatty

    Reply
  6. Donna says

    July 29, 2011 at 7:05 pm

    Love it! I’ll have to make some 🙂

    Reply
  7. The Autocrat: Haley says

    August 1, 2011 at 7:22 pm

    Earring hoops?! You are a genius!!! I am totally making some of these at my next party! Thanks for the inspiration!

    Reply

Leave a Reply Cancel reply

Your email address will not be published. Required fields are marked *

hi there, i’m anna

dnirssyellow dnipinterestyellow dnifacebookyellow dniinstagramyellow AnnaDNI2014 Welcome to Directions Not Included. I'm Anna, the voice behind the blog. I'm a marketer, crafter, DIYer, and lover of wine and sushi. Oh and I love my husband Ray, too. I also seem to be a magnet for scruffy mutts and cats. Want to know more about us and what we are doing? Learn more here.

what we’ve been up to

looking for something?

pinterest addict

Visit Anna [DirectionsNotIncluded]'s profile on Pinterest.

our lovely sponsors

RMPotteryButtonFINAL2AD-Button adad

about

Directions Not Included follows the DIY and craft adventures of two humans, three dogs and two cats as they take one old Florida home and make it theirs.

This blog will feature DIY tips, before and after photos, craft tutorials, home decor trends, and gratuitous pictures of our five rescued furry children.

Copyright 2010 - 2014. Directions Not Included - Anna Cruz-Morales.

The contents of this blog, including text, original photos and ideas are the sole property of the author. If you intend to use my text or images, please link back to my site and credit given to Directions Not Included. Please share only one image and direct readers to my site. A notification email would be greatly appreciated.

like us on facebook

like us on facebook

don’t miss any of the fun

dnirssyellow dnipinterestyellow dnifacebookyellow dniinstagramyellow dnitwitteryellow dnigoogleyellow

subscribe via email

Enter your email address to subscribe to this blog and receive notifications of new posts by email.

Copyright Directions Not Included 2014 * ·Daily Dish Pro Theme * Modified by Directions Not Included * Genesis Framework * by StudioPress * WordPress * Log in