Directions Not Included

DIY and craft adventures of two humans, three dogs and two cats.

  • home
  • about us
  • house tour
    • before & during
    • the afters
  • project gallery
    • renovations
    • furniture & decor
    • holidays
    • events
    • crafts
    • archives
  • featured
  • contact
    • advertise
    • disclosure
    • privacy

pass the coasters – tile coaster tutorial

July 13, 2011 12 Comments

I’ve had a stack of plain paper coasters I bought to decorate with a paper Mod Podge technique for awhile. I thought they would be easy to have on hand when we have big groups of people over and really simple to store. When I saw this tutorial on Pinterest with tiles I thought it would be a great idea for more permanent coasters. 
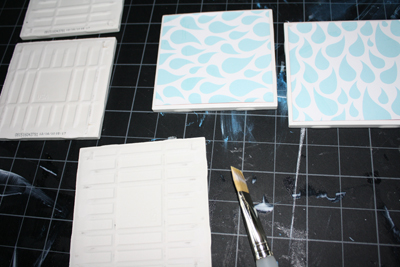
4 x 4 white tiles from Home Depot were 16 cents a piece making this a super inexpensive project to tackle. Paint brush, Mod Podge, paper of my choice and a blade.
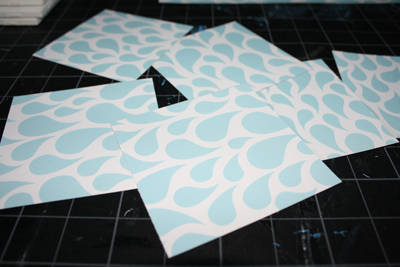
I measured out my tiles making sure to leave a small edge around all of them. I used those measurements to draw with pencil on the back of my paper to use as a guide for cutting. I always like to draw cutting marks on the backside of paper.
Used my metal ruler and a craft knife to cut out the paper squares in the right size for my tiles. I liked this teardrop paper for our living area but of course any paper would work for your house.
I glued down the paper squares onto the tile with a thin layer of Mod Podge. Make sure to evenly spread the Mod Podge and not drip it on so that you can have a clean finish. I’ve found that pressing down the paper prevents air bubbles too. After I pressed down the paper, I turned them on their good side and let them dry like that to keep everything straight.
Once dried, I did a few layers of Mod Podge on top of the paper and tile. I like to wait at least 30 minutes between applications. It is really humid now in Florida so things like this take  longer to dry. In some areas you may be able to get away with it when it is dry to touch. This is not the best photo but you can kinda see the wet Mod Podge around it.
 
Once the tiles were completely dried, I cut out some pieces of felt I had on hand to the backs of the tiles. I had a bunch of those felt circles you use for the bottom of the furniture on hand but of course I couldn’t find where I stored them. I hand felt from the 4th of July wreath I made so I used that. Either option would work well for this.
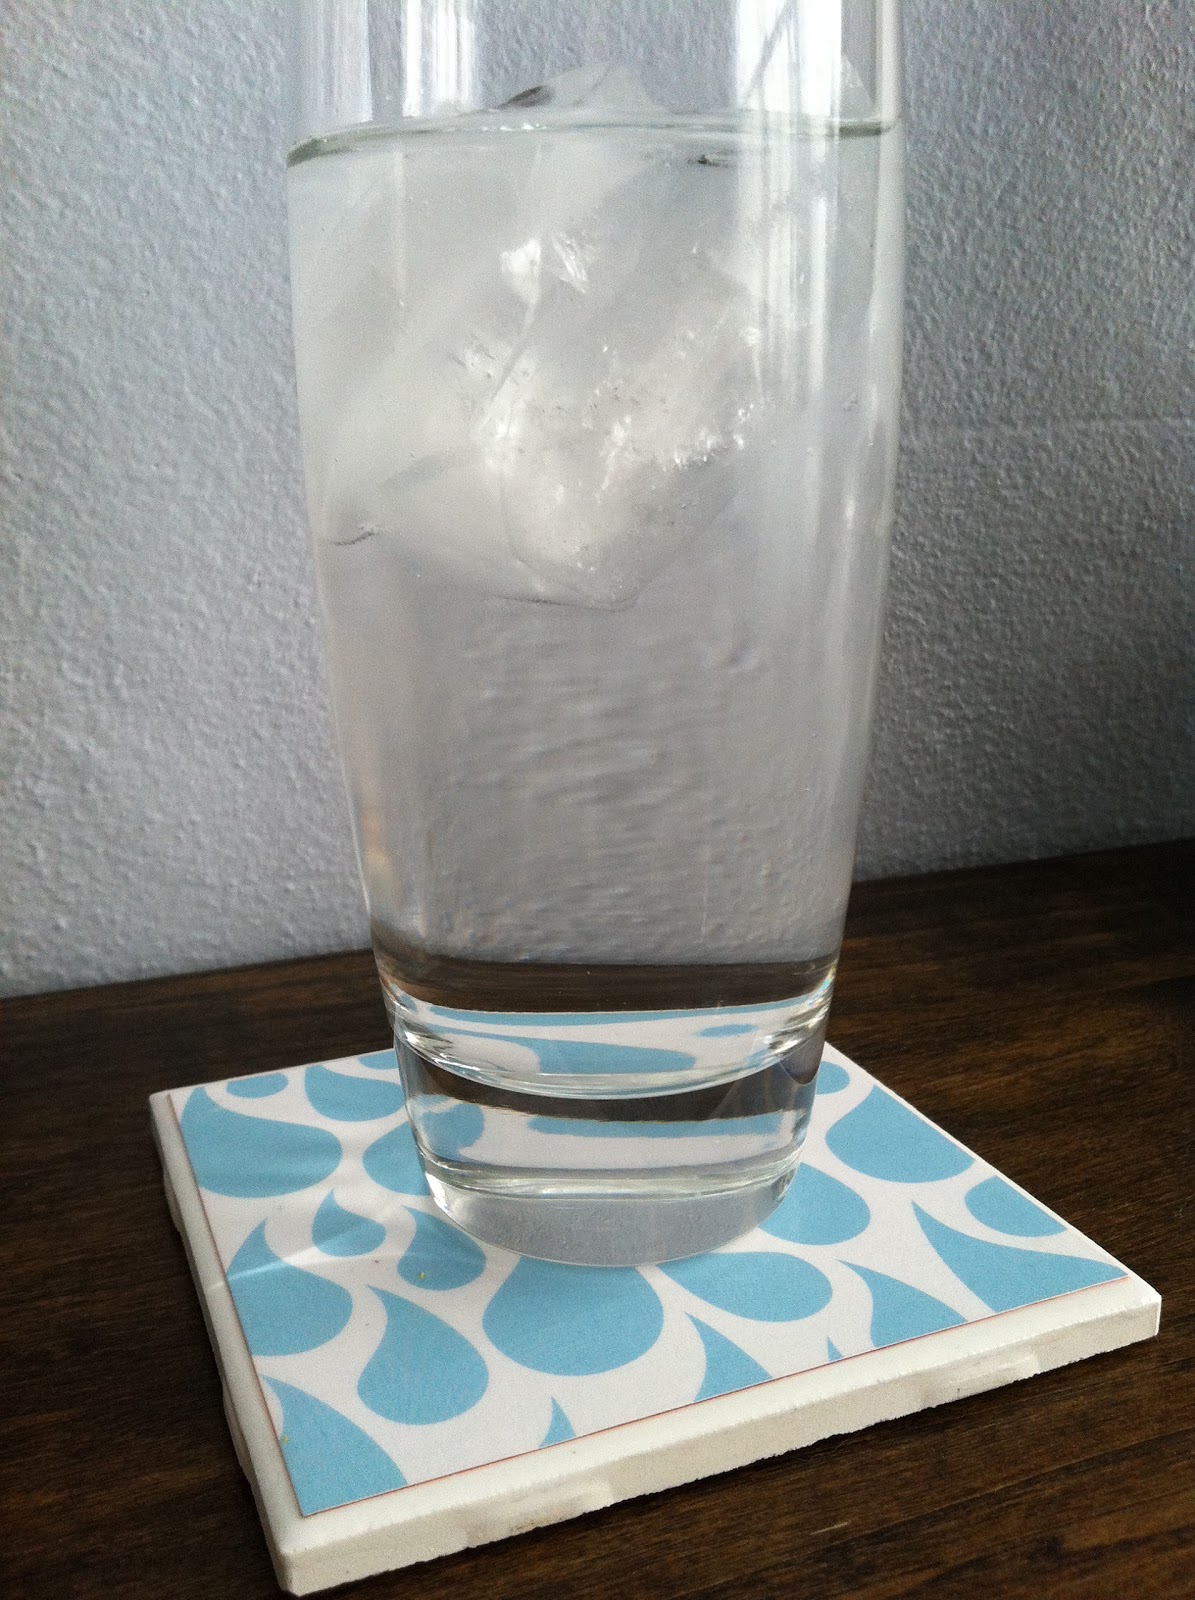
And there you have it – a simple set of personalized coasters for our home! 
While making these the idea of holiday coasters came to life. I started my Halloween ones already and showed them to a friend who now wants ones for Christmas and Halloween.  I better get started early and buy a box of tiles next time I hit up Home Depot 😉
Linking up to my favorite link events here: Link Events
Thanks for following Directions Not Included!

you might also like:

ahoy there mateys - oirate themed party cupcake toppers
a sweet treat - honey wedding favors - UPDATED
pet crafts - national love your pet day

Filed Under: crafts, home decor, tutorial Tagged With: craft tutorial, crafty gifts, decor, paper, pinterest

About Anna@DirectionsNotIncluded

Hi there! I'm Anna, the voice behind Directions Not Included. I'm a marketer, crafter, DIYer and lover of all things home related. You can usually find me covered in paint, cuddled with one of my pets or in front of a computer or other digital device. Thanks for reading Directions Not Included. I hope you stick around.

Comments

  1. Patty says

    July 13, 2011 at 3:17 pm

    Cute! And it looks super easy too! I think I will have to make a few for our house and presents too.

    Reply
  2. Tulip and Turnip says

    July 14, 2011 at 12:29 am

    SO cute! It would be an awesome gift for someone…I’m thinking housewarming or even a holiday gift (you could find some cute kitchy holiday paper!) I love it!

    Reply
  3. Rosa says

    July 14, 2011 at 8:59 pm

    I’ve really been wanting to try this, but keep forgetting! Thanks for the reminder! 😉
    Yours look great!
    Have a great day!

    Reply
  4. Debra says

    July 15, 2011 at 4:09 pm

    Really cute! I love the idea of having different ones for the holidays. They would make great gifts.

    Reply
  5. Carrie @ Hazardous Design says

    July 17, 2011 at 9:26 pm

    I am TOTALLY trying this! Great idea!

    Reply
  6. Katharine says

    July 19, 2011 at 1:08 pm

    I love this idea! Thanks for the tutorial! I will definitely be trying this!

    Reply
  7. Coley says

    July 19, 2011 at 6:44 pm

    these are so dang cute!

    Reply
  8. Audra says

    July 19, 2011 at 6:24 pm

    Hi! I found you on the Homework blog link party. I love this idea, it would make a great and inexpensive gift! I will definitely be trying this craft 🙂

    Reply
  9. SJ @ Homemaker On A Dime says

    July 20, 2011 at 11:25 pm

    I’m so grateful that you linked up in this week’s Creative Bloggers’ Party & Hop 🙂 This awesome post totally rocked the party!

    Reply
  10. Julia @ 551Eastdesign says

    July 21, 2011 at 6:10 am

    Yay cute coasters:)

    Reply
  11. Jess@Balancing The Dream says

    July 21, 2011 at 5:18 pm

    such a cute idea!! Thanks for sharing!!

    Reply
  12. Peggy of Plush Nest says

    July 24, 2011 at 10:18 pm

    the pattern you chose is just perfect! nice work!

    Reply

Leave a Reply Cancel reply

Your email address will not be published. Required fields are marked *

hi there, i’m anna

dnirssyellow dnipinterestyellow dnifacebookyellow dniinstagramyellow AnnaDNI2014 Welcome to Directions Not Included. I'm Anna, the voice behind the blog. I'm a marketer, crafter, DIYer, and lover of wine and sushi. Oh and I love my husband Ray, too. I also seem to be a magnet for scruffy mutts and cats. Want to know more about us and what we are doing? Learn more here.

what we’ve been up to

looking for something?

pinterest addict

Visit Anna [DirectionsNotIncluded]'s profile on Pinterest.

our lovely sponsors

RMPotteryButtonFINAL2AD-Button adad

about

Directions Not Included follows the DIY and craft adventures of two humans, three dogs and two cats as they take one old Florida home and make it theirs.

This blog will feature DIY tips, before and after photos, craft tutorials, home decor trends, and gratuitous pictures of our five rescued furry children.

Copyright 2010 - 2014. Directions Not Included - Anna Cruz-Morales.

The contents of this blog, including text, original photos and ideas are the sole property of the author. If you intend to use my text or images, please link back to my site and credit given to Directions Not Included. Please share only one image and direct readers to my site. A notification email would be greatly appreciated.

like us on facebook

like us on facebook

don’t miss any of the fun

dnirssyellow dnipinterestyellow dnifacebookyellow dniinstagramyellow dnitwitteryellow dnigoogleyellow

subscribe via email

Enter your email address to subscribe to this blog and receive notifications of new posts by email.

Copyright Directions Not Included 2014 * ·Daily Dish Pro Theme * Modified by Directions Not Included * Genesis Framework * by StudioPress * WordPress * Log in