Directions Not Included

DIY and craft adventures of two humans, three dogs and two cats.

  • home
  • about us
  • house tour
    • before & during
    • the afters
  • project gallery
    • renovations
    • furniture & decor
    • holidays
    • events
    • crafts
    • archives
  • featured
  • contact
    • advertise
    • disclosure
    • privacy

a little celebration – paper bunting tutorial

August 29, 2011 4 Comments

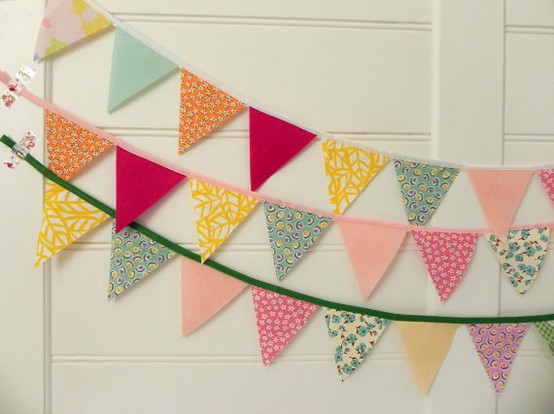
I love bunting. It makes it feel like a little celebration is happening wherever it is.
Via
Via
Via
It is so simple to make these banners with paper so I thought I would add a little celebration to my craft room. I’m in the middle of finishing an update to my entire craft room, which I’ll share as soon as I’m done organizing it. In the meantime, here is a simple bunting tutorial to try.
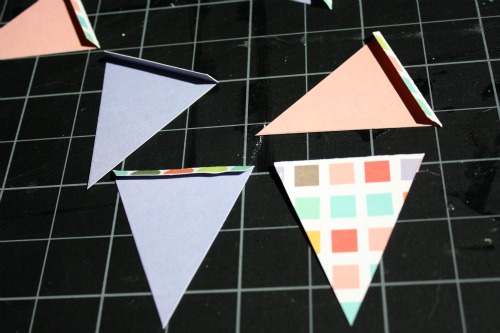
Pick your selection of coordinating papers and make yourself a template with cardstock. Since I was just making a small bunting banner I only used two types of paper.

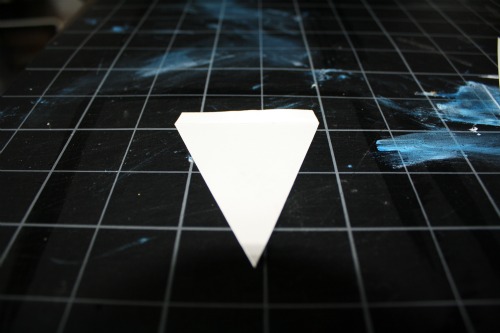
I cut out my template and then folded the edge back to make an area for the ribbon to be folded under.

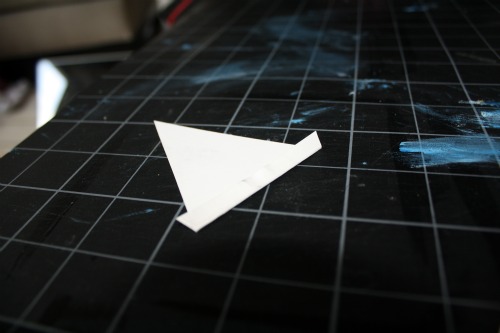
When you cut off the little extra tips, you are left with a template that has the edges ready for folding over. 

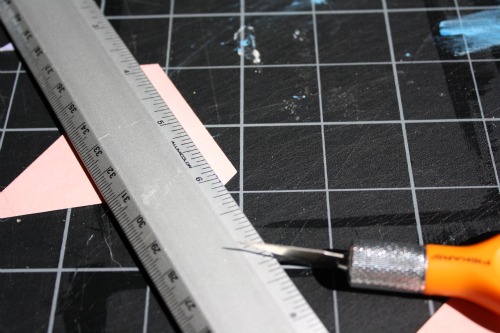
Trace the template onto your paper and cut with a ruler and craft knife. I like to cut with the backside of the paper facing up to keep the front side clean.

These photos makes me realize I should probably get a new cutting mat if I’ll be using it for photos. Oops.
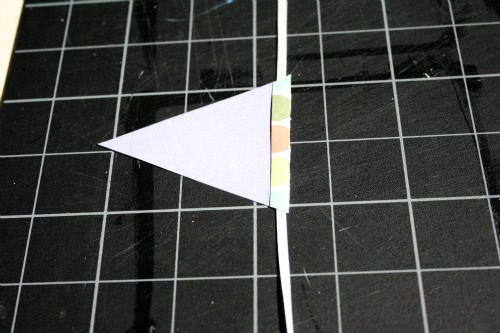
Score the backside of each banner along the line where you will fold it back. Only lightly score it with the craft knife and the ruler — you don’t want to cut through the whole sheet. I used cardstock so this step was important. If you use regular weight paper you can skip this step and just fold the paper over.

I used a bone folder to make a nice clean crease on each of the pieces. From the front all you see is a clean straight triangle.

Cut your ribbon to the length required and use a little bit of craft glue to adhere your ribbon to the triangle. Fold it over and press it down tight.

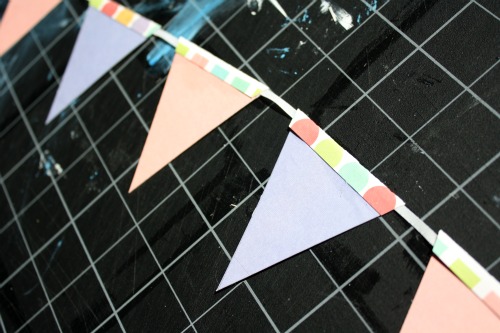
Space each triangle out evenly and repeat the process and you have your banner.

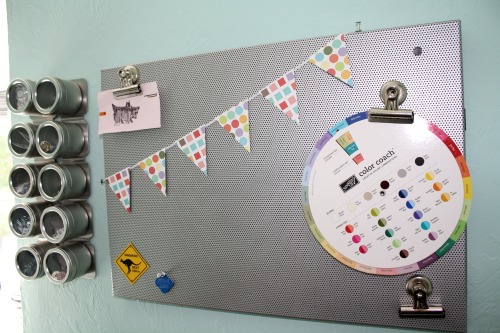
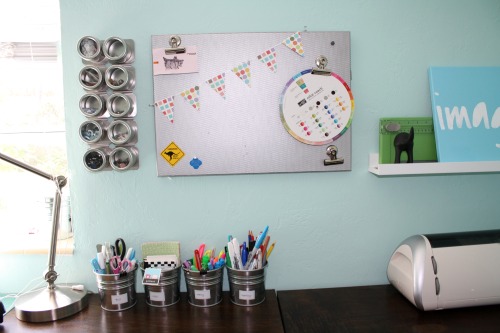
And here is the finished bunting banner adding a festive feel to my bulletin board in the craft room.

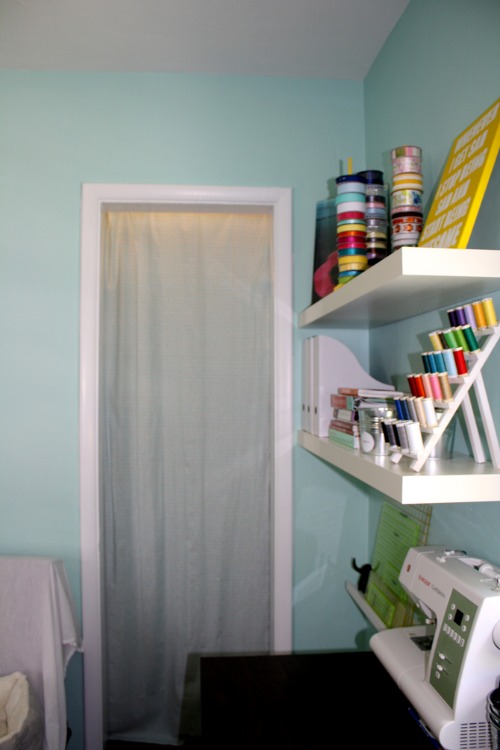
Here are two sneak peaks into the organization and decoration overhaul that I’m doing in the craft room. Promise I’ll post more as soon as I am done.

I’m loving the new craft space and I can’t wait to show it all to you. I’m flying into San Francisco today for a conference all week but I have posts lined up and ready to go. The craft room will have to wait until I am back since it will needs some work. Have a great week!

Linking to my favorite link events: Link Events

Thanks for following Directions Not Included!

you might also like:

project nursery - chalkboard arrow sign
bachelorette weekend favors - diy hangover kit
girly girl - a colorful fabric wreath tutorial

Filed Under: crafts, tutorial Tagged With: craft organization, craft room, craft tutorial

About Anna@DirectionsNotIncluded

Hi there! I'm Anna, the voice behind Directions Not Included. I'm a marketer, crafter, DIYer and lover of all things home related. You can usually find me covered in paint, cuddled with one of my pets or in front of a computer or other digital device. Thanks for reading Directions Not Included. I hope you stick around.

Comments

  1. Emily @ EAKaHouse says

    August 29, 2011 at 6:29 pm

    cute! have fun in San Fran

    Reply
  2. Free Things By Britney says

    September 2, 2011 at 6:03 pm

    That looks great! Inspiring. I’m a new follower from Homework’s blog hop.

    Reply
  3. Melissa says

    September 2, 2011 at 6:04 pm

    I’m following from Homework’s blog hop. Great organization – very cute!

    Reply
  4. Tanya Anurag says

    September 2, 2011 at 3:47 pm

    Cute 🙂

    Reply

Leave a Reply Cancel reply

Your email address will not be published. Required fields are marked *

hi there, i’m anna

dnirssyellow dnipinterestyellow dnifacebookyellow dniinstagramyellow AnnaDNI2014 Welcome to Directions Not Included. I'm Anna, the voice behind the blog. I'm a marketer, crafter, DIYer, and lover of wine and sushi. Oh and I love my husband Ray, too. I also seem to be a magnet for scruffy mutts and cats. Want to know more about us and what we are doing? Learn more here.

what we’ve been up to

looking for something?

pinterest addict

Visit Anna [DirectionsNotIncluded]'s profile on Pinterest.

our lovely sponsors

RMPotteryButtonFINAL2AD-Button adad

about

Directions Not Included follows the DIY and craft adventures of two humans, three dogs and two cats as they take one old Florida home and make it theirs.

This blog will feature DIY tips, before and after photos, craft tutorials, home decor trends, and gratuitous pictures of our five rescued furry children.

Copyright 2010 - 2014. Directions Not Included - Anna Cruz-Morales.

The contents of this blog, including text, original photos and ideas are the sole property of the author. If you intend to use my text or images, please link back to my site and credit given to Directions Not Included. Please share only one image and direct readers to my site. A notification email would be greatly appreciated.

like us on facebook

like us on facebook

don’t miss any of the fun

dnirssyellow dnipinterestyellow dnifacebookyellow dniinstagramyellow dnitwitteryellow dnigoogleyellow

subscribe via email

Enter your email address to subscribe to this blog and receive notifications of new posts by email.

Copyright Directions Not Included 2014 * ·Daily Dish Pro Theme * Modified by Directions Not Included * Genesis Framework * by StudioPress * WordPress * Log in